Search This Blog

Showing posts with label #natural nails. Show all posts

Tuesday, March 10, 2015

Nail Art Water Decals DLS - 193 from Born Pretty Store

Hello my nail lovers =)
Today I'll show you Nail Art Water Decals DLS - 193 from Born Pretty Store!
Pozdrav moji noktoljupci =)
Danas ću vam pokazati vodene naljepnice  DLS - 193 sa Born Pretty Store-a !
picture is from BPS web site
These decals comes in one sheet (as seen on the photo above) so you have to cut them on the size that fits the nail! But that really isn't a problem!

Ove naljepnice dolaze ovako cijele na jednom papiru ( kao na slici gore) pa ih se treba izrezati na veličinu nokta! Ali to i nije neki problem!


HOW TO USE / KAKO KORISTITI:

You cut the shape and dip it into the water for approximately 20 sec.
Then you remove white paper background and  place the image onto the nail!
I found out that they work the best if you dry them a little with a paper towel before you place them onto the nail. 
After that you have to press and keep pressing for like 15-30 sec before they're stucked onto the nail.
They are really easy to apply!

Izreže se naljepnica i stavi u vodu na cca 20 sekundi.
Zatim se izvadi iz vode i makne bijela podloga te se naljepnica stavi na nokat!
Otkrila sam da najbolje funkcioniraju ako se malo posuše sa papirnatom maramicom, prije nego se stave na nokat.
Nakon toga naljepnicu treba pritisnuti ( na noktu) i držati tako 15-30 sek sve dok se ne zalijepi. 
Jako se lako nanesu!


For the base I used the best white nail polish that I've tried so far - My Boyfriend Scales Walls by O.P.I.
The color is actually off white, with the grey undertone, but it's not very noticeable on the nails!
The formula is amazing, fully opaque in 2 coats!!
Although it's not in their normal range, you can still find it on eBay (I did)!


Kao bazu sam koristila najbolji bijeli lak koji sam do sada probala - My Boyfriend Scales Walls od O.P.I.
Boja je zapravo nekako off bijela, sa sivim podtonom, ali to se ne primjeti jako na noktima!
Formula je odlična, potpuno pokriva sa 2 sloja!!
Iako nije u sastavu njihove standardne linije može se lako naći na eBayu ( ja sam ga tamo kupila) !


So what do you think? 
I must say I love them, they're beautiful and really easy to apply =)

I što mislite?
Moram reći da su meni super, jako su lijepe i doista se lako nanose =)


You can buy them HERE for $ 1,99
Don't forget to use a code HE10K31 for 10% off

Možete ih kupiti OVDJE za 1,99$
Ne zaboravite na kod HE10K31 za 10% popusta =) 


Thank you for reading, don't forget to find me on
 Till the next time xoxo  

Hvala na čitanju, ne zaboravite me naći i na
Do slijedećeg puta xoxo 

Monday, March 2, 2015

MoYou Nails plate 101 + stamping polish by BPS

Hello nail lovers =) How are you doing?
Today I'll show you plate 101 from MoYou Nails and what I did with it! 

Pozdrav noktoljupci, kako ide?
Danas ću vam pokazati pločicu za pečatiranje broj 101 od MoYou Nails i što sam sa njom napravila!


This is how the plate looks (image is from google).. For me the images are super cute =)

Ovako pločica izgleda ( slika je sa googlea).. Meni su dezeni baš slatki =)


 For the base I've used Hrvatska Ljubav by Parrot Polish (review)

Kao bazu sam koristila Hrvatska Ljubav od Parrot Polish-a (recenzija)


As you can see I did one design with owls using white stamping polish from Essence.
Second design is with these funny eyes xD

Kao što možete vidjeti napravila sam jednu manikuru sa sovicama koristeći bijeli lak za pečatiranje od Essence-a.
Drugu sam napravila sa ovim smiješnim očima xD


For the base I used (S)Wimbledon by Catrice. Gorgeous sorta like a neon mint polish <3
 
Kao bazu sam koristila  (S)Wimbledon od Catrice-a. Predivni nekako neonski mint lak <3


For this one I used black stamping polish from BPS.
It retails for 2,93$ at the moment (it was 4,19$) and here is the direct LINK!
This polish has quite tick consistency but I could live with that. The thing that bothers me  is that no mater how long I wait before applying top coat it always smudges this polish.
You can always see some small stripes - frustrating.
I know it's not the problem in my top coat bc I use the same one all the time.
So overall I wouldn't recommend it to you!

Za ovaj sam dizajn koristila crni lak za pečatiranje od BPS-a.
Trenutno košta 2,93$ (bio je 4,19$) i evo direktnog linka ako vas zanima!
Sam lak je dosta gust, ali s tim bih i mogla živjet. Ono što me smeta kod njega je da bez obzira koliko dugo čekam prije nego nanesem top coat , uvijek se raspacka.
Male crne crtice su vidljive kad god nanesem top coat - frustrirajuće.
Znam da problem nije u mom top coatu jer uvijek koristim istoga.
Tako da vam ga nebi baš preporučila!


And that's it =) My interpretation of the plate 101 =)
You can get it HERE for £4.49, its 10% OFF!

I to je to =) Moja interpretacija pločice 101 =)
Možete ju naći OVDJE za £4.49, sada je na 10% popusta!

Thank you for reading, don't forget to find me on
 Till the next time xoxo  

Hvala na čitanju, ne zaboravite me naći i na
Do slijedećeg puta xoxo 

Friday, January 16, 2015

Essence - 02 Always on my mint

Hi guys, I've finally find the perfect mint color :D yeey
 The polish called Always On My Mint is part of the Essence's Like An Unforgettable Kiss collection available from December 2014. to February 2015.
 I've bought this one in Muller for 16,90 HRK ( about 2.50 - 3 $ ), great price!!

Pozdrav ljudovi =), konačno sam našla savršenu mint boju laka :D yeey
Lak se zove  Always On My Mint  i dio je Essence-ove kolekcije Like An Unforgettable Kiss  koja je dostupna od prosinca 2014. do veljače 2015.
Ja sam ga kupila u Mulleru za 16,90 kuna, super cijena!!


  The color is so delicate and pastel and just as I wanted it to be <3 just gorgeous!!
I feel like its white polish with few drops of green <3 <3 
As for the formula, it's not so great. The polish is a bit tick it's also quite uneven on first coat but second one even things out!! 
Although the formula is not great I can pass that since the color is so perfect =))  
I used 2 coats no top coat for the photos!! 

Boja je tako nježna i pastelna i taman kakvu sam cijelo vrijeme htjela <3 predivna!!
Imam osjećaj kao da je to bijeli lak sa par kapi zelene <3 <3
Što se formule tiče, pa ona i nije tako dobra. Lak je pomalo gust i prvi sloj ne prekriva  jednoliko, ali drugi sloj popravi stvar!!
Iako formula nije super meni ta savršena boja nadomjesti stvar  =))
Koristila sam 2 sloja bez top coata na slikama!!


 Overall I love this polish I think it's great for spring. If you're into mint colors you have to have this one <3

Sve u svemu, volim ovaj lak i mislim da je odličan za proljeće. Ako se i vama sviđaju minti boje definitivno ga isprobajte <3

 Thank you for reading, don't forget to find me on
 Till the next time xoxo  


Hvala na čitanju, ne zaboravite me naći i na

Do slijedećeg puta xoxo   

Monday, December 8, 2014

Stamping plate QA19 review and nail art / Pločica za pečatiranje QA19, recenzija i nail art

Hello my dear nail art friends, I hope you're doing great =) 
Today I'll share with you a review of a Christmas  themed stamping plate that I've got from Born Pretty Store! 

Pozdrav moji dragi noktoljupci, nadam se da ste super =)
Danas ću podijeliti sa vama recenziju pločice za pečatiranje Božićne tematike, koju sam dobila sa Born Pretty Store-a!  


As you can see on the photo above, it has pretty much every design or image that's been usually done in this time of the year on our nails :D 
 Quality is great, I don't know if you ever tried any of the BPS plates but in my opinion they're in range with the MoYou London ones with much more acceptable price!
This one is on sale now and it retails for only 0,99$, it was $2,99 before!
Great deal!! (in my opinion)
 HERE is a direct link to it in case you're interested ;)

 Kao što možete vidjeti na slici gore, pločica uglavnom sadrži sve dezene koji se obično koriste za ukrašavanje noktiju u ovo doba godine :D
Odlične je kvalitete, ne znam ako ste ikad probali neku od pločica sa BPS-a ali po mome mišljenju one su u rangu sa onima od MoYou London ali sa puno prihvatljivijom cijenom!
Ova je trenutno na akciji i košta samo 0,99$, a bila je 2,99$!
Odlična  prilika!! (po mom mišljenju)
 Evo i direktan LINK do pločice u slučaju da vas interesira ;)


 I kinda wanted to put every design there is on my nails, so you can see how they look.
Only the black polish is for stamping, so I'm pretty happy how the other ones look!

Željela sam staviti sve dezene sa pločice na nokte da možete vidjeti kako izgledaju.
Samo je crni lak namijenjen za pečatiranje, tako da sam prilično zadovoljna kako su drugi ispali!

Polishes I've used / Lakovi koje sam koristila: 

Alpine snow - O.P.I (as a base / podloga)
Black stamping polish - Essence
The Spy Who Loved Me - O.P.I (red / crveni) 
 Flormar - M105 (brown / smeđi)
Sparkling seaweed - Northern Star Polish (green / zeleni) - REVIEW/ RECENZIJA 
 Space queen - Essence ( top coat)


 What do you think? Did you ever tried any of the BPS's stamping plates?

I kako vam se čini? Jeste li ikad probali neku od BPS pločica za pečatiranje?


Thank you for reading, don't forget to find me on

 Till the next time xoxo  

Hvala na čitanju, ne zaboravite me naći i na

Do slijedećeg puta xoxo 

Friday, November 14, 2014

Make Your Own Nail Wraps/Decals

Hello my polished friends =) hope you're doing great!! 
I posted this mani few days ago on my Facebook page and some of you said you want to know how I did it so here it is =) .. Just for you :* 


I saw this technique a long ago from YouTube nail artist Meliney but I was lazy to try it till now :/ 

Let me first tell you what I used :  

Gold Silk by Parrot Polish on my thumb, index and pinky finger (REVIEW)
Blanc by Essie on middle and ring finger (REVIEW)
 Stamper and 
Scraper (REVIEW)
Stamping plate - MoYou London Pro collection 08 (REVIEW) 
Good to Go! Fast drying top coat by Essie 


 Basically, I did everything that you normally do when you do stamping: apply polish on the desired image on the plate, scrape the excess polish with the scraper, press the stamper onto the image so it transfer completely from plate to stamper.
Now (this part is different) I filled the design with different polish colors (green,orange,dark pink), using nail art brush, on the stamper!! You don't transfer the image onto your nail jet!
When I filled the image, I applied top coat over it and let it dry for about 30 min if you apply fast drying top coat!!
After the image on the stamper dries, you have to take tweezers and gently separate it from the stamper and transfer it onto the nail. Make sure the base color is still wet so the image can stick to it (or add a coat of top coat on the base color)!! 
After you place and set your decal add some top coat over because it smoothes everything out!

Don't worry if the image is bigger than your nail, just put some acetone or nail polish remover on  Q-tip or brush and remove it. Decal is made of polish so it come off easily!! 

And that's it, its very easy and allows you to have perfect design!


Usually when I do stamping I can't transfer entire image on my nail, especially if my nails are longer, so this is the perfect way I get the perfect design on my entire nail :D

I hope this post helps you to create beautiful designs =) 
I would love to see your work, so please tag me on Facebook or Instagram  =)

Thank you for reading, don't forget to find me on
 
Till the next time xoxo  

Monday, November 10, 2014

O.P.I - I Saw...U Saw...We Saw...Warsaw + nail art


most recent stamping adventure =)
Hello my friends =) hope you're doing great!!  On this rainy Croatian day I decided to review an oldie but goody by O.P.I! I bought this polish I think in June for 4 euros (it was on sale 70% off) but since I like more of a bright/neon polishes in summer I didn't really use this one till now!! 
I love this polish so much that I decided to write a post just for it :D

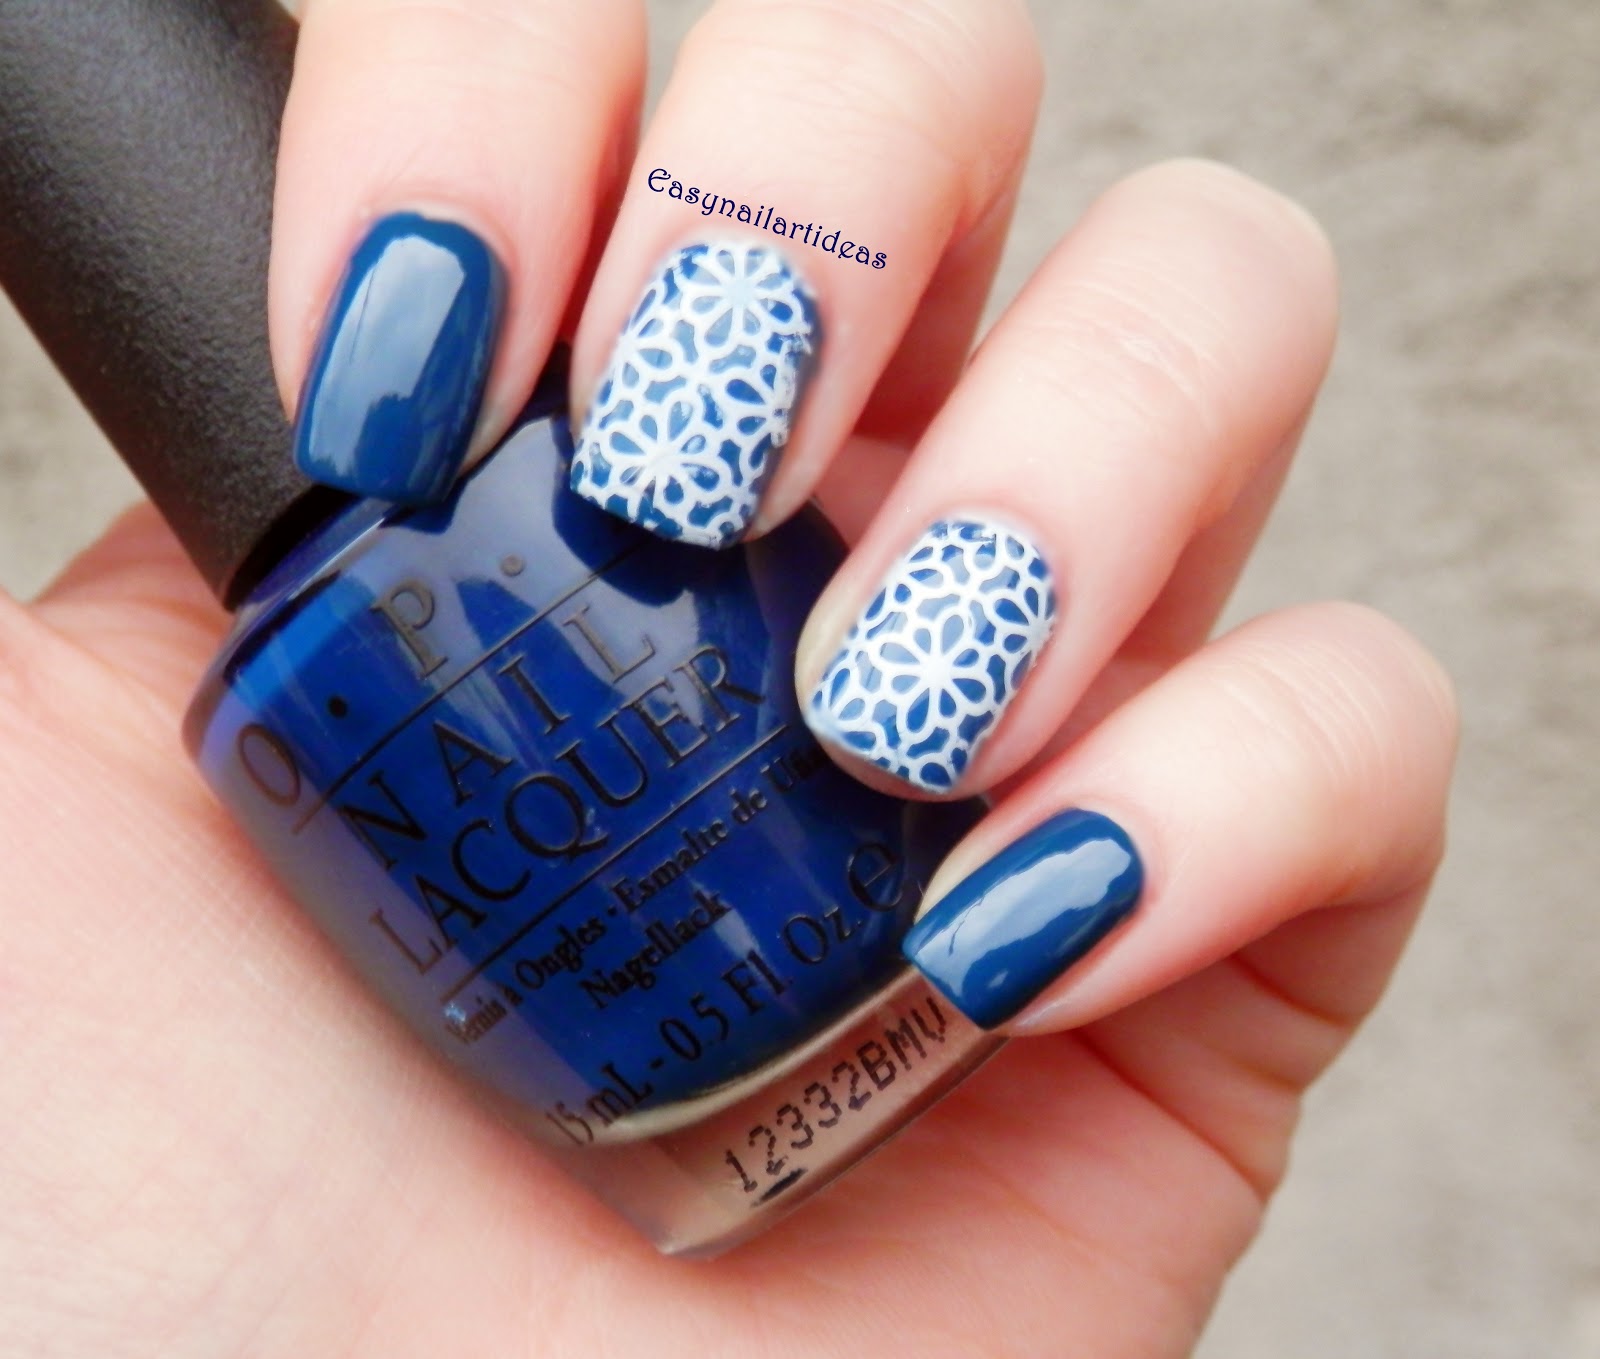
 I Saw...U Saw...We Saw...Warsaw (I love the name) is a dark blue creme, opaque in 2 easy coats, dries quickly with nice shine!
It's part of O.P.I's Euro Central Collection for spring/summer 2013., although it's more of a fall/winter color for me (at this point)
I've done 3 nail arts so far using this polish, 2 of them you already saw if you're following my blog on regular basis... 

Dry marble technique - TUTORIAL
TUTORIAL

I absolutely love this polish from color to formula to finish, it's absolutely perfect for me. And to think just few months ago I was telling that blue polishes looks weird on my nails and I didn't wear them lol 

For this nail art, I've used stamping plate QA65 from bornprettystore (READ MORE ABOUT THE PLATE HERE!) 


Discount code for BornPrettyStore - HE10K31 

What do you think of this polish? Do you own it?
Did you like my nail art? 

Don't forget to find me on: 

Thank you for reading my blog :*
Till the next time xoxo  

Thursday, September 25, 2014

Welcome autumn easy nail art

Hello my friends, hope you're doing great. I don't know about you but I'm already all into warm, fall colors. I've left my brights behind like there were no summer at all lol
But then again I've used 2 colors from O.P.I summer collection to do this design - ironic lol
And by the way I'm not a huge fall/winter lover!


I did this design few days ago and I decided that it would be my welcoming fall one lol
 I kinda wanted to recreate the amazing yellow/orange autumn trees just like the one in the picture above!


First I've painted my nails white (as a base), I've used Alpine snow by O.P.I. 
Then I've dabbed , using a make-up sponge,orange Where did Suzi's Man-Go by O.P.I and yellow I Just Can Cope-Acabana by O.P.I. 
I started painting the trees using a black nail striper (I did 3 nails with it), but mine dried out so it was impossible to do it that was so I continued using black acrylic paint and a nail striping brush! I must say it was much more easier, but then again that's probably because the polish was dried out!
And then I just added some top coat - Essie Good to go and that was it.. 


I think this design is really cute and easy to do, I've received a lot of compliments for it =))
Hope you'll try it :D

And that's it =) Don't forget to find me on Instagram, Bloglovin, Twitter and Facebook   

till the next time xoxo 

Tuesday, September 23, 2014

How to - GALAXY NAILS!

I believe galaxy nails are one of the most popular nail art designs out there.. I don't think there's a nail enthusiastic that didn't tried galaxy nails at least once.
They can be done using all kinds of colors, from black and dark ones to lighter pastels even white ones!!

Today I'm gonna show you my versions of  this famous design and how I did them.
In case if you know who's the founder and creator of this design, please let me know in the comments =)


Let me tell you how I did it step by step:

1 I painted my nail with a silver base, I've used Silver Dakota by Parrot Polish (REVIEW). You can also use black!
2 With a make up sponge, I dabbed , first- shimmery duochrome blue called Blue Macaw by Parrot Polish (REVIEW). You can use simple creamy blue polish but I found out that it has prettier effect if you add shimmery one!
Then I dabbed shimmery pink polish called Candy Coral also from Parrot Polish, you can also use purple polish , that works great too =)
I wanted to add a bit of a darkness to my design so I dabbed  just a little bit  of black I've used KIKO n°819
3 As a final step I added topper with a fine holographic glitters called Space Queen by  Essence
This is my second time doing galaxy nails and it's my go to  design, because it's so easy and fast. And it doesn't have to be perfect! 

First time when I did it I used black base , then I dabbed shimmery blue, purple (instead of pink), silver and added just a few bigger silver glitters before Space Queen topper, and that's the only bigger difference between my 2 designs .

my first galaxy


 These were my 2 galaxy design, pretty much the only main difference are the base polishes I've used and the silver glitters !! I hope you like them and find this post helpful!

You can also find me on Instagram, Bloglovin, Twitter and Facebook  

Till the next time xoxo  

Thursday, July 31, 2014

Nail art using beautiful blue roses water decals

Hi guys, hope your having a great day so far =) Mine was pretty calm and relaxing. I didn't do much today I'm just chillin' and being lazy .. but that's what summer is for right? :D

Today I'm gonna show you some beautiful water decals that I got from Born Pretty Store ,tell you all about them and show you the design I've made using them.

First let me show you how they look..


As you can see they look beautiful, but they don't came cut out to fit your nails (like nail wraps). You have to cut them yourself on sizes that fits your planed design. For me this isn't a bad thing because this way you can do whole nail, just tips or place single rose wherever you like.

For my first design I decided to cover entire nail with the design and this is how it looks..


How did I do this:
I painted 3 of my nails in a shimmery indigo blue color, I've used Nicole by O.P.I called Listen to Your Momager  from their Kardashian collection. This is a dark blue jelly base filled with light blue micro glitters (very pretty). I used 2 coats plus top coat.
Then I painted 1 coat of white polish (Alpine Snow by O.P.I) on my accent nails.
I waited for the colors to dry and then I cut out the images to approximately fit my nails.
Then I removed the transparent foil that was covering the decals and dip them into the water (one at the time) for about 30 seconds.  You'll know if the decals are ready by gently moving your thumb across the design, if the design is separating from the white paper base then they're ready to be used. At this point I just separated the decal from the base and placed them onto my nail, they don't stick right away so you have time to place them where you want.
I've dried the nail (decal) with some paper towel and then removed the access of the decal with  polish remover. The final step is, as always, the top coat. And that's it =)
oh yeah I almost forgot I've made a dots on the blue base with a gold shimmery polish, just to add a little touch =)


 They're really easy to use and to remove latter on. Also great quality and price ($2,86).


In case you want to try them you can find them HERE!
Don't forget to use code HE10K31 for 10% off any order + free shipping worldwide =)

till the next time xoxo

My Instagram, Bloglovin', Facebook, Twitter