Search This Blog

Monday, September 8, 2014

Tiffany's blue box inspired nail art + tutorial

Hello my polish friends =) I was planing to do this post for a days now but I was just lazy to do it on the weekend ..so here it is (finally)

As you can probably tell from the title this is going to be my version of famous Tiffany's blue box design!

This is what Tiffany & co. says about it: "Crowned with a white ribbon, the Tiffany Blue Box is an international symbol of style and sophistication. " 
and I agree!! (although I don't own anything from them :( ) 


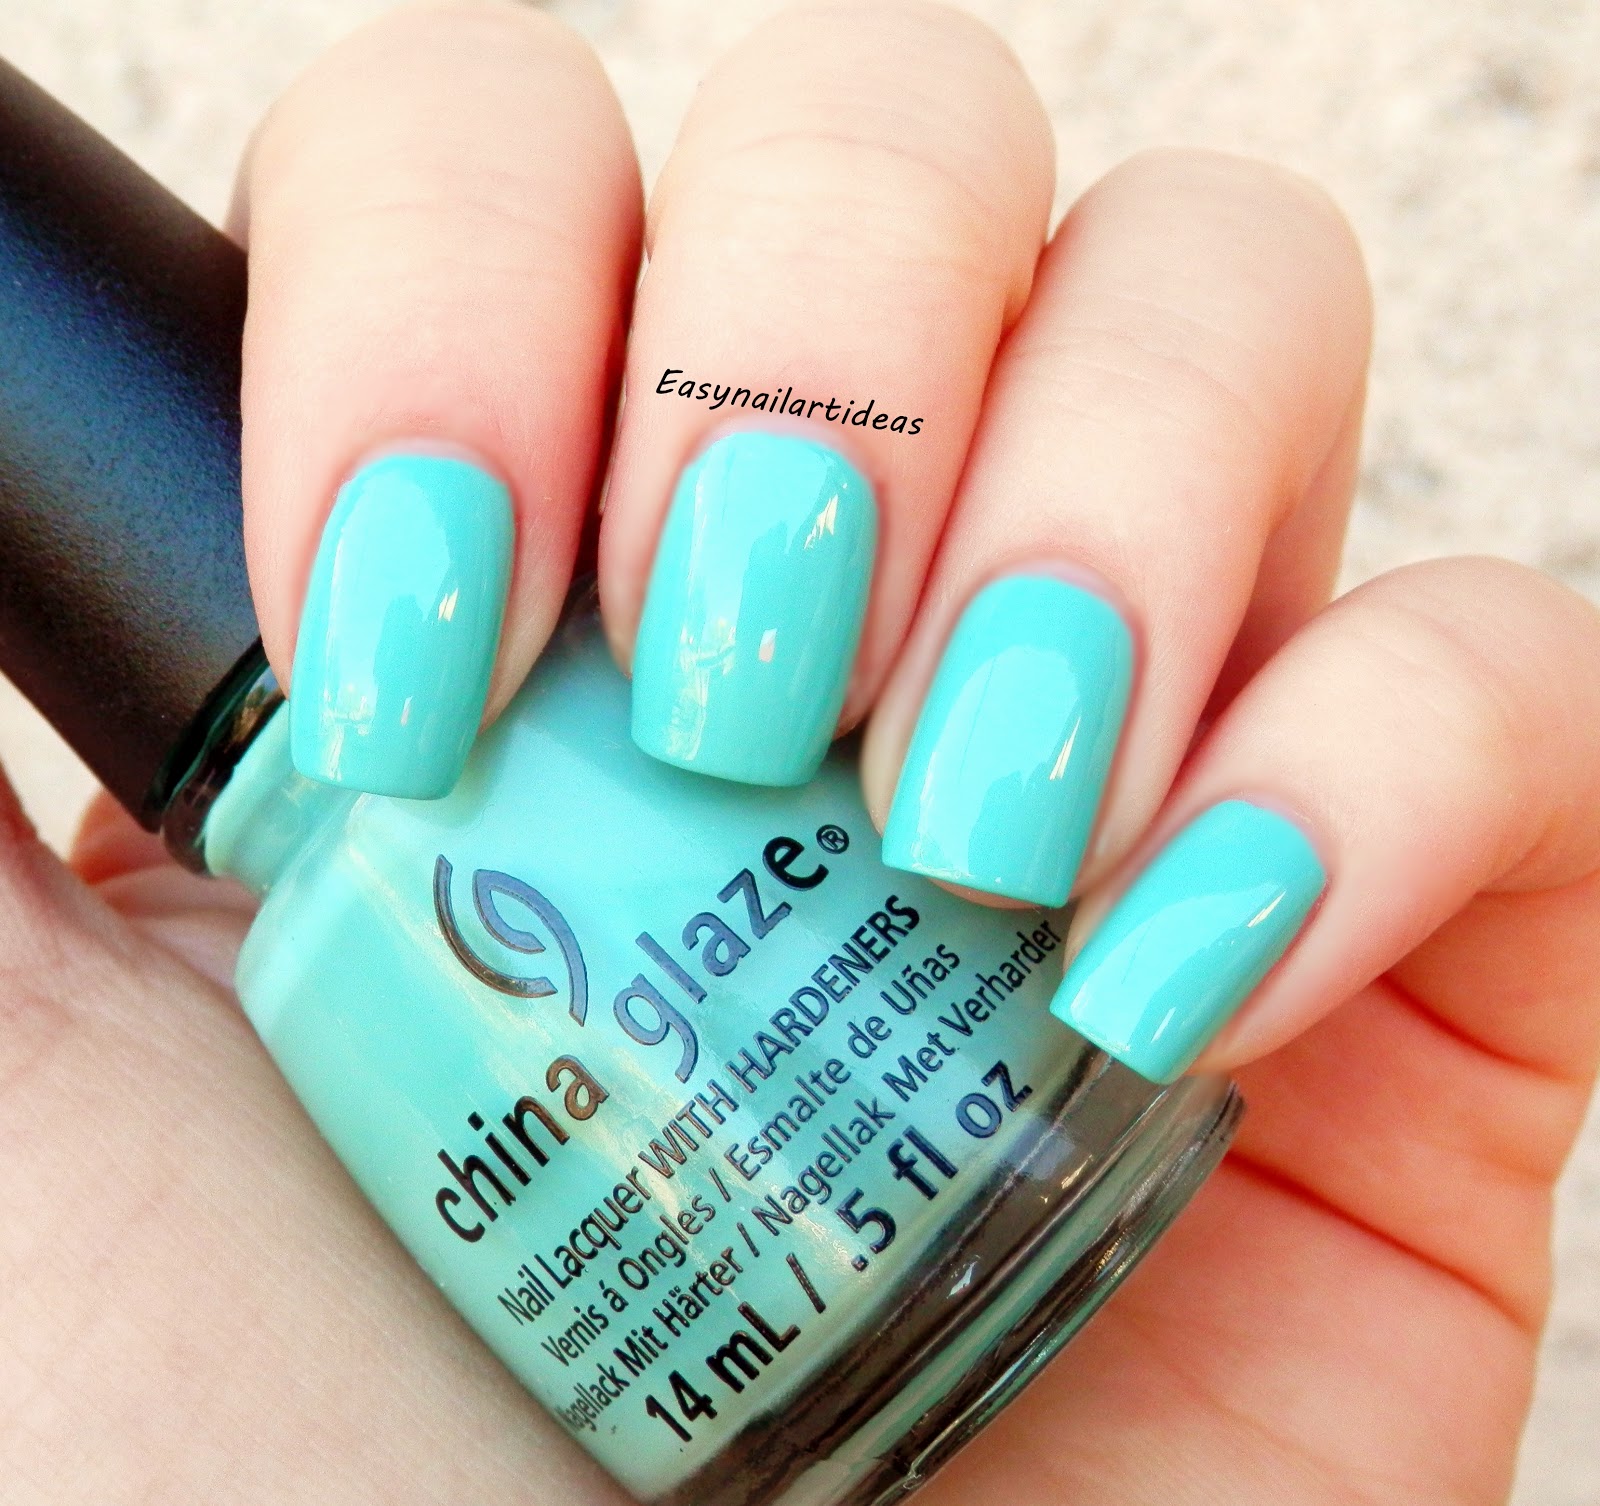
The inspiration for this design came from my very first and only (so far) China Glaze nail lacquer called For Audrey


For Audrey is a beautiful creamy polish that reaches full opacity in 2 thin coats. Formula is outstanding which makes application so smooth and easy. It's a perfect Tiffany blue color.
If you're in search for the perfect China Glaze polish then definitely consider this one (if you don't already own it).
Here are the swatches ( 2 coats, no top coat)


 And now let me show you how I did it..


 1 painted my nails with For Audrey (2 coats)
2 placed the tape
3 painted inside of the tame with Alpine snow by O.P.I (white)
4 made a bow using a small dotting tool and placed little nail ring =)

Easy right?

Hope you've enjoyed todays design and tutorial. Until next time xoxo

Wednesday, September 3, 2014

Cute tag

Hi guys how are you doing? My dear friend Andreea from Ditta's nail design & art  tag me to do this interesting polish related tag :)


Basically there's 11 questions , polish related, that I'll be answering to! 

So let's get started :)

1. Which color family of nail polish do you own the most of?

This is the question I can't answer without looking at my polish collection and counting. . . And I must say it was very tight , but surprisingly I have the most GREEN polishes (14) :D I taught there will be the most purples, pinks or blues but the greens took the victory by 3 polishes lol


2. Name your most favorite memory you associate with a specific polish?

I'm afraid I don't really have any favorite memory regarding any specific polish. But I do remember exitement when I received my first O.P.I polishes :D 


3. What's your best-kept secret for chip-free polish?

To be honest my polish usually don't have time to chip lol .. I do my nails very often so..
My lets call it a "secret" for chip - free polish would be Seche Vite  top coat , great product..


4. Which brand do you own the most colors and why is that formula your favorite? 
 
I'm so happy to say that , after a year of blogging , finally I own the most O.P.I polishes. Not all of them have perfect formula but none of them has bad one. The color range is amazing and I just love that brand.
Ps I did buy all of them myself ;)


5. Name the polish you like the least in your collection and why you still hold onto it. 
 
I actually have 2 polishes that I'm very disappointed in but I still hold on to them.
They're Fashion Playground by Essie and Green Tea by Sally Hansen complete salon manicure.
They're both kinda minty green colors that have the worst formula ever expecially Essie. I've been searching for the perfect mint color for ages , still haven't found one :/
But yeah these are the polishes I wouldn't recommend you to buy! 


6. Name your holy grail of polish remover? 
 
That's easy : Afrodita acetone free polish remover.. it's simply the best and it contains d-pantenol so it doesn't dry my nails so much. Ps it's not so expensive!


7. If you use glitter or nail effects, which is your favorite brand and why? 
 
My favorite glitter brand is Shimmer Polish. They have great range of any kinds of glitters..
I also love O.P.I's liquid sands, they're my favorite textured polishes.


8. Do you match your toes to your nails when you repolish?
 
No! I never match them, that's to boring for me ; )


9. Name the specific polishes you've repurchased more than twice to show us your holy grail colors. 
 
The only polish I have repurchased is white one.. but I didn't repurchased the same brand. First I had Essie but wasn't satisfied with it so I bought O.P.I Alpine Snow. That one is better but still not perfect!


10.Do you paint accent nails or only use one color?
 
I always do an accent nail even when I do nail art I tend to change one nail to make it more interesting! I rarely use just one color!


11.Can you name the oldest polish in your collection?
This one is very hard to answer. I'm not sure but I think my oldest would be Am I Blue Or Green? by Catrice. I acctually got that one as a gift when I bought some magazine :D


And that's it! I invite you to do this fun tag and to share it with me :*

till the next time xoxo 

Sunday, August 31, 2014

Matching Manicures - polka dots

Hi guys! Hope you're having great Sunday. .
Today is the day to do a Matching manicures with my friends from Balkan Beauty bloggers group.
The time is come to do polka dots :)

Everyone who follows my Blog or Instagram, Facebook or Twitter could already see me doing dots in all kinds od ways..but for this occasion I did brand new ones. 

For this design , I was inspire by a picture I found on Google... it's from  I'm Anaa.
It takes some time and patience to do this but I think it's worth it!


For the base I've used  Alpine snow by O.P.I, and for the dots: I Saw...U Saw...We Saw...Warsaw and He blue it this time! both by O.P.I


Hope you liked today's manicures. Till the next time xoxo

You can check out what other girls did here:


Tuesday, August 26, 2014

Back to school nail art tutorials

Hello guys =) how are you doing?
Since the school is just about to start I decided to do 2 easy designs that I taught will be cool for going back to school (rime lol)

First design is actually very popular and I was planing to do it for like a year now .
It's Argyle inspired nail art!


Recently I bought 2 O.P.I polishes from the coca-cola collection on eBay and I immediately  think of this design when I saw them. I will be posting review for them soon so stay tuned!

So how I did it?!
...


 1 I painted my nails with silver polish
2 I put striping tape in X shape, I've bought mine on eBay for like a 1$ ( lot)
3 I painted one side of X in black and other in this peachy-pink color
4 I've immediately removed stripes after step 3 ( don't wait until the polish dries)
5 and 6  I've used a white striper to do the lines, to complete the design.
at the end I've added a top coat and that's it =)


For second design I was inspired by my notebooks. I always scribble something when I'm bored =)


 This one is even easier then first one.


1 paint your nails white then make blue stripes with nail striper
2 make coral/red stripe across the blue ones
3 on this step you can make pretty much what ever you want with black striper or toothpick =)

and that's it =)))


These are my 2 easy back to school designs =) hope you've liked them and you'll try them =)

don't forget to follow me on Bloglovin', Instagram, Facebook and Twitter 


Thursday, August 21, 2014

Little Mermaid inspired nail art

Hi guys I hope you're doing great. I just got back from a vacation and the first thing I had to do is, of course, a manicure lol.. and share it with you =)
The nail art that I'll be showing you today is LITTLE MERMAID nail art inspired by the Mermaid collection by Paint Shop Polish (PSP) that I reviewed not so long ago. If you've missed that one and want to check it out here is the LINK.
 Although this design is inspired by this collection, they're not the only polishes I've used. I'll list all the polishes and tools that I used bellow =)

Here's what I did...


 As you can see I did an ombre on my thumb and index finger using O.P.I's "HE BLUE IT THIS TIME!" (I posted swatches of this one on my INSTAGRAM) , China Glaze FOR AUDREY (yet to be swatched) and O.P.I's DON'T BOSSA NOVA ME AROUND (review here). I done the starfishes with a doting tool and then I toped the thumb with SEAWEED GARDENS by PSP from their mermaid collection and index with MERMAID'S GOLD. They gave the most amazing shine and perleascent effect.

On the middle finger I decided to do some seaweed in the sea lol  .. as a base I've used O.P.I's "HE BLUE IT THIS TIME!" again, and then I painted the seaweed with nail striper using gorgeous sparkling green polish by Northern Star called SPARKLING SEAWEED. This polish actually was the inspiration for this finger and I also did a review on it that you can check out HERE! At the end I topped it with UNDER THE SEA by PSP (from mermaid collection).

On the ring finger I've done little mermaid's bikini top and just the top of her tail. As a base I used O.P.I's DON'T BOSSA NOVA ME AROUND. For the bikini top I've used Lilacism by Essie , A GRAPE FIT! by O.P.I an SIREN SONG by PSP and a nail striper. For the tail I used the perfect mermaid tail color - FISHTAIL by PSP.

And last but not the least is my pinky finger =) I was inspired by the Ariel's (little mermaid's) hair so I just painted it red! But not just any red, it's sparkling red by Northern Star called BURNING EMBERS ( read a full review HERE)

more pictures =)) ...

Sparkling in the sun
polishes from the Mermaid collection that I used for this design


 And that's it guys =) I hope you've enjoyed reading and watching my design as much as I've enjoyed doing it :*

Till the next time xoxo 

Sunday, August 10, 2014

Matching Manicures - glitters

Hi guys , how are you today?
Recently I joined a facebook group called Matching manicures- Balkan Beauty Bloggers and the first "assignment" after I joined in was to create glitter manicures :)

The one that I did is very simple and it includes my 2  favorite polishes :Essie Lilacism as a base and Shimmer Polish - Nicole ( gorgeous glitter polish read a review on that one here).


These types of manicures are so easy and fast to do and doesn't require any additional tools.
Since this is my first Matching Manicures post I hope I did it good :)


Till the next time xoxo

Don't forget to follow me on Bloglovin', Instagram, Facebook, Twitter and Google+  


Check out what other girls did =)

Saturday, August 2, 2014

Let's talk make-up #2 - Beauty UK

I just realized I didn't do a make-up post for a looong time, so I decide to show you one eyeshadow pallet, eyebrow set and blush from a brand called BeautyUK that I absolutely love. I already talked about this brand in the post about some of their lipsticks and crayons that you can find HERE. Although this is really affordable drugstore brand the quality of their products is amazing and its great both for beginners and more advance make-up artists.
They're based in UK but they have an online shop as well and they do ship worldwide =)

Let me first show you this gorgeous eyeshadow palette that I have..


 This is a part of the Posh palettes.  They are available in four sensational collections, this one is the newest no.4 called Galaxy. This palettes are well pigmented and perfectly presented and they are the new generation of Beauty UK’s famous, award-winning eye palettes. 
It contains 10 mostly shimmery shades. The case is made of a hard white plastic so it wont break easily, and it has a useful mirror on the inside of the lid plus the 2 side applicator. 
The colors are stunning, they go from nudes to purples, blues and blacks. Perfect for darker night looks but also more lighter, natural day looks. I simply love it. The only downside for me is the applicator because I don't really like these sponged ones :/ But I do have my own brushes so this isn't that big of a deal.

Let me show you how they swatch ...


The second thing I want to show you today is ALL IN ONE BROW DEFINITION KIT from the same brand. The set comes in a cute little packaging that's made from hard plastic as well.  It contains 3 shades and one colorless wax  that helps keeping the brows in their place. The set also includes some really good tweezers and double ended application brush. I love how cute and little they are but jet so efficient.


In the back of the packaging you can find the instructions, and they said:

step 1- Shape and define your brows using the angled brush. Dip in the soft, colorless wax and use smooth, angled strokes.
step 2- Use the soft blending brush to apply the setting powder. This will fill in any sparse areas and lock the brow in place.
step 3- Perfect your look by using the precision tweezers to remove any stray hairs. Done! 

I love this set because it suitable for all hair types and colors , you can easily mix the 3 shades to get exactly what you need. As you can see on the photo I use the lightest color the most  =)
If you don't already own some sort of brow kit I think you can give this one a go for only £3.99!


Last thing I have to show you for today is my favorite  highlighter/blush  =) . It's a baked-box blush by Beauty UK no.3 called HALO (great name)


 Although the box says it's a blush in my opinion it's more of a highlighter because it gives you amazing glow and not much color. But I like it that way because you can use it just like a highlighter or blush in the summer when you only want something sparkling on your cheeks =)
 The packaging is made from cardboard slim, square box with a square mirror within the flip lid.  The cardboard compact closes  tight thanks to a magnet. The baked blush contains 4,4g of product which is really good for the price of £3.99. 

look how gorgeous this is

amazing glow

This is an absolute must have for all of us girls. It's so wearable and usable in more ways, for such an affordable price. 

Overall I obviously love all of the  products I've show you today and really think every girl should have something like this in her make-up bag, whether you do your make-up a lot or from time to time like me =)

In case you don't have BeautyUK in your country, don't worry they have an online shop that ships worldwide and here's the LINK =) 

Don't forget to follow me on Bloglovin', Instagram, Facebook and Twitter =) 

Till the next time xoxo