Search This Blog

Showing posts with label blue. Show all posts

Monday, December 29, 2014

L'Oreal Paris - 811 Magic Croisette and Svenja's Nailart nail vynils

  
My dear nail art friends, here I am again after a little break =)
I hope you had beautiful and peaceful Christmas! 
The winter has come and my country is filled with snow, the sun is shinning today so it's beautiful =)
 Today I'll snow you beautiful blue duochrome/shimmery nail polish that I got as a gift from my BFF Marina! It's a Color Rich nail polish from L'Oreal Paris and it's a part of their L'Or electric collection! 
It comes in a small and super cute bottle with golden top that holds 5 ml of product . 

Moji dragi noktoljupci, evo me nakon kraće stanke =)
Nadam se da ste proveli predivan i miran Božić!
Zima nam je došla i naša divna Hrvatska je prekrivena snijegom, kod mene danas sija sunce pa je baš predivno =) 
 Danas ću vam pokazati divni plavi duochrome/šimerasti lak za nokte, koji sam dobila od svoje naj frendice Marine!
To je zapravo L'Oreal Paris Color Rich  lak koji je dio L'Or electric kolekcije! 
Dolazi u maloj slatkoj bočici sa zlatnim čepom, koja sadrži 5 ml proizvoda.

ONE COAT / JEDAN SLOJ
The polish is called MAGIC CROISETTE N°811. The formula is great, goes on really smooth. it's fully opaque on first coat but second coat builds up the color so it look prettier in my opinion!
It's darker blue polish with teal, green even gold shimmer that shines so beautifully on day light.
I also like the brush that is flat and wide, makes application easier and more precise!
Maybe the best thing about it is that is available in pretty much any drugstore worldwide!

Lak se zove  MAGIC CROISETTE N°811. Formula je odlična, nanosi se lijepo bez nabora.
Potpuno pokriva već sa prvim slojem ali sa drugim boja postaje intenzivnija pa je po mom mišljenju lijepše sa 2 sloja!
Tamno plave je boje sa tirkiznim, zelenim pa čak i zlatnim svjetlucavim česticama koje dođu savršeno do izražaja na danjem svijetlu.
Sviđa mi se i četkica koja je plosnata i šira pa je nanošenje lakše i preciznije!
Možda i najbolja stvar je što je dostupan u gotovo svakoj drogeriji širom svijeta!

ONE COAT / JEDAN SLOJ
 
2 COATS / 2 SLOJA     
I've made a little nail art over this gorgeous blue using nail vinyls from Svenja's Nail Art.
They retails for 2,80 euros and you can find them HERE!! 

Napravila sam i nail art koristeći naljepnice za nokte od Svenja's Nail Art.
Naljepnice koštaju 2,80 eura i možete ih naći OVDJE!!


I love these vinyls because they're easy to work with and they make perfect designs! The only thing you have to be careful about is to make sure your base polish ( in my case Magic Croisette) is completely dry before you start to work with the vinyls !!

Volim ove naljepnice jer se lako s njima radi i naprave savršen dezen! Jedina stvar na koju trebate paziti je da vam donji/bazni lak (u mom slučaju  Magic Croisette) bude potpuno suh prije nego što počnete koristiti naljepnice!!
  
inside with a flash 


I've used O.P.I's It's Frosty Outside liquid sand for the stars =)
It's my favorite textured polish!!! 

Koristila sam  O.P.I - It's Frosty Outside, liquid sand za zvijezde =)
Moj najdraži teksturalni lak za nokte!!! 


Overall I love this polish from L'Oreal and would recommend  it to everyone, if you find it buy it lol
I really like the final manicure done with Svenja's vinyls also, love those too ;))
What do you think?? 

Sve u svemu, super mi je ovaj  L'Orealov lak i preporučila bih ga svima, ako ga nađete kupite ga!! 
Sviđa mi se i kako je ispala manikura sa Svenjinim naljepnicama, super su mi ;)) 
 Što vi mislite?

Thank you for reading, don't forget to find me on
 Till the next time xoxo  

Hvala na čitanju, ne zaboravite me naći i na
Do slijedećeg puta xoxo  


Monday, December 1, 2014

MMS: GRADIENT + stamping plate review

Hi guys, hope you're doing great =) 
I'm a day late for this weeks matching manicure Sunday, sorry  :/ . 
This week's theme is gradient and since it's already a December I decided to post a winter design.


This is the design that I applied for the "winter is coming" giveaway run by Ditta's nail art & design, I hope it'll bring me luck :D


 I've used :

POLISHES: 
1. O.P.I - Alpine Snow (white )
2. Gothic Gala Lacquers - Crush (light blue )
3. O.P.I - He Blue It This Time! (blue)
4. O.P.I - My Signature Is "DC" (silver )
5. Essence - Cool Breeze ( effect topper) 
6. Essence - stamping white polish 

 I've used 1.,2., and 3. for the gradient / ombre! 
I did and whole post/tutorial on how to do a gradient/ombre nails so if you don't know how , you can learn HERE!!

For the stamping (snowflakes) I've used 3., 4., and 6. 

TOOLS:
make-up sponge (for the gradient)
tape (to protect my nails and reduce cleaning up)
 stamping plate QA58 from Born Pretty Store
stamper and scraper
This is the plate I've used =) I must say it's perfect for this time of the year and a must have for any nail art / stamping lover! 
I pretty much used every snowflake there is on the plate, because I wanted to have all of them on my nails and because they are all different in the nature too so... 
It really made my life easier because I could never paint such small and perfect snowflakes freehanded! 
The quality of the plate itself is really good, even the smallest snowflakes transfer completely onto the nail. 
It retails for $2.99 and I highly recommend it to everyone who likes stamping!!
If you want you can use a 10% discount code HE10K31 
You can find this plate HERE!! 


So what do you think? I'm really happy how it turned out :D

Thank you for reading, don't forget to find me on


You can check out what other girls did here:

Friday, November 7, 2014

HRVATSKI LJUBAV by Parrot Polish

 Hi guys, here I am again with the most amazing polish I've tried this fall.


It's called Hrvatski Ljubav or Croatian Love and it's part of the International Love collection by Parrot Polish! The collection consist of 13 amazing chrome polishes and if you're interested you can find reviews HERE!!

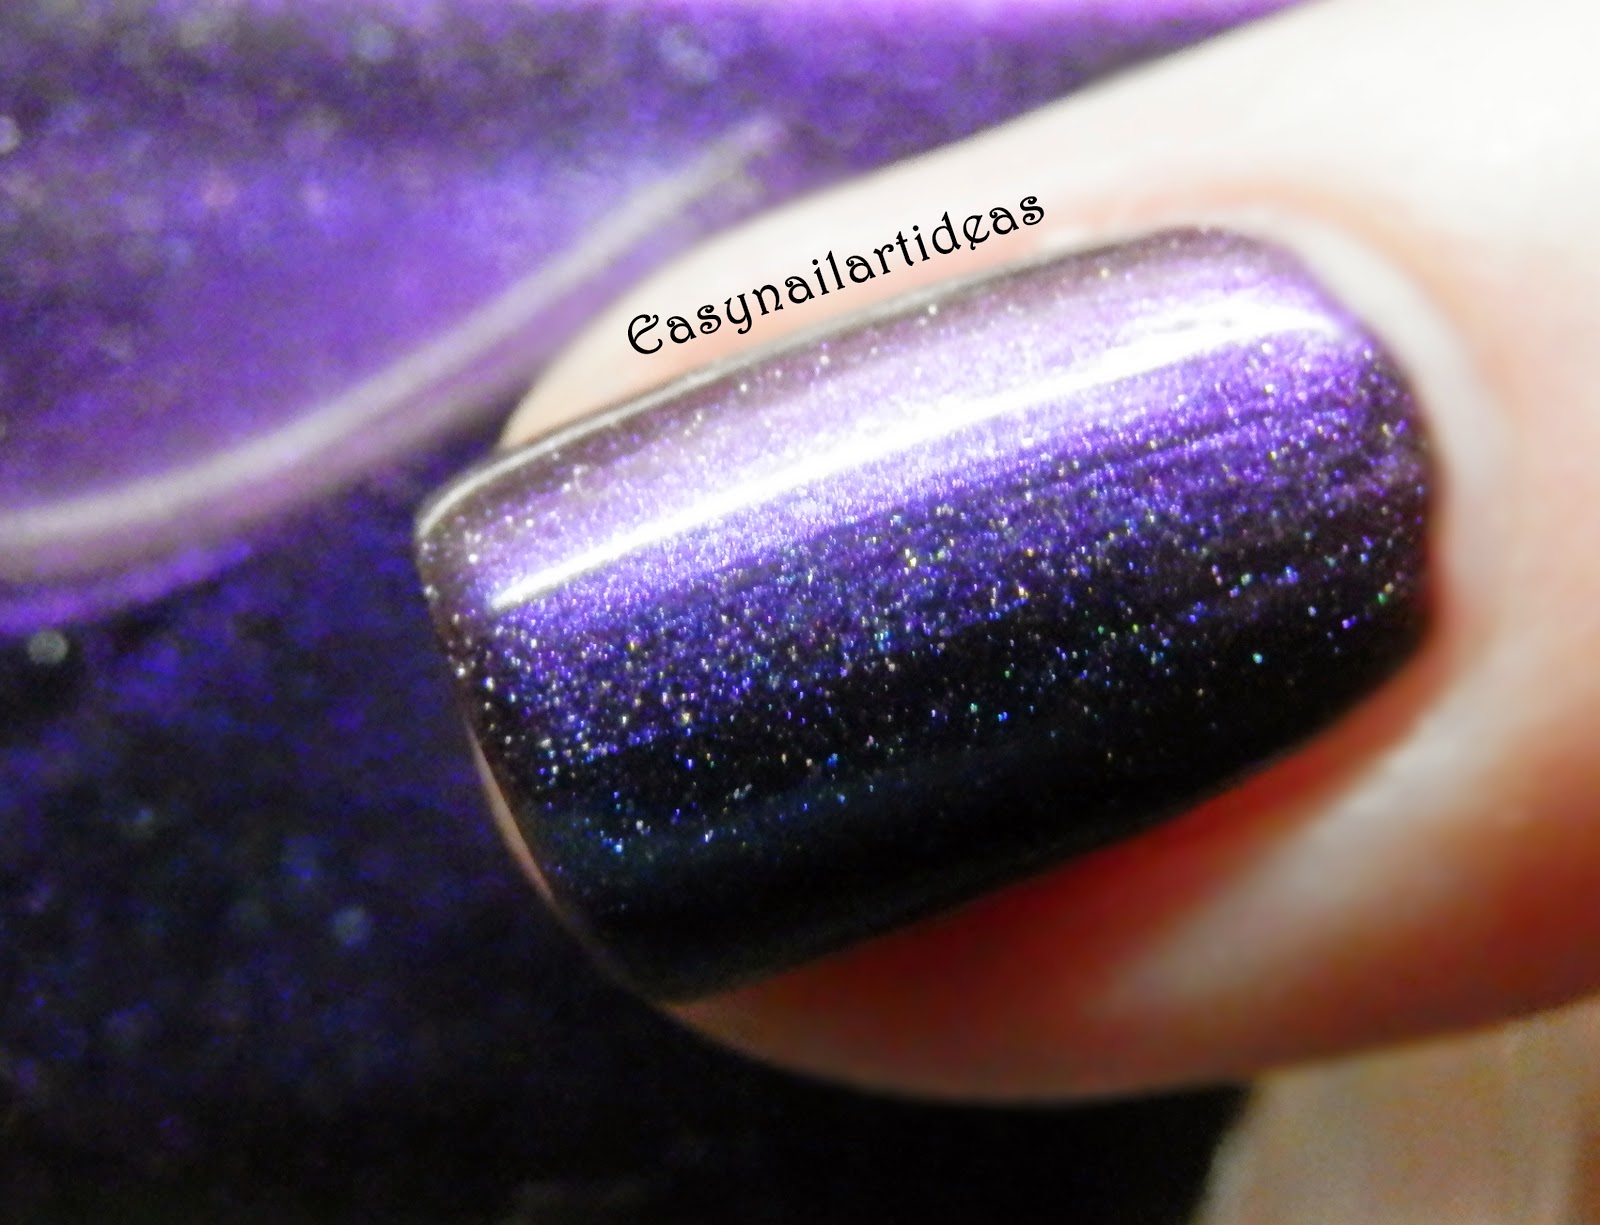
Hrvatski Ljubav is so unique, it shifts from black, green to plum, purple and in some lightnings even blue!! Like my friend Moni's Mani said it's like having peacock on your nails, just gorgeous!!

gorgeous black and smaragd green 
plum/purple! Sorry for the blurry photo, it's hard to take all the shades 


yap this is the same polish :D 

 I'm so impressed with this polish that I had to show you all these photos =)

As for the FORMULA it's bit on the tick side but that doesn't effect the application, I did 2 coats   for the photos bellow and no top coat. It has most amazing glossy finish so top coat is not even necessary!
 It dries quiet fast sorta like regular O.P.I creme polishes.

Overall I'm so impressed not just with the color but with everything in general! Perfect fall/winter color, amazing formula and free shipping, what can be better then that ;)

All the polishes from international love collection retails for $ 12,00 and the shipping is free worldwide! 

Thank you for reading and I hope you like the polish and my swatches, I really tried hard to capture all the transitions =)

There will be more photos in my other social medias so don't forget to find me there : 

till the next time xoxo 


Friday, October 10, 2014

Glow in the dark nail polishes from Parrot Polish

Hello my friends, how are you doing?
I'm quite busy  writing and preparing my graduation thesis so I've neglected a bit my blog and fb page :/
I've found time to finally show you the most amazing polishes I own, and that's because they glow in the dark.
It's so cool and fun when I turn off the lights before going to sleep and realize that my nails glows  lol ... Kinda spooky also lol
I have 6 polishes to show you today, 2 of those are regular glow polishes and 4 of them are top coats!! They are all from Parrot Polish, indie polish brand that I talked so much in the past few months. If you want to know more about them you can read my previous reviews!


They are absolutely stunning!


GLOW YUK - is supposed to be a glow in the dark version of neon green called Mr. Yuk - my all time favorite polish  (REVIEW). The formula is great, I applied two coats over white, but it's not so neon as the original one and it dries in a semi-mat finish. I don't think that's a negative thing because the color is still vibrant and so pretty <3
In the photo bellow you can see the Glow Yuk on the left and the original Mr. Yuk on the right. They're both taken in the daylight!!


Now let me show you how it looks in the night ;D


As you can see, the glow is really intense and it's even more equal and vibrant in real life. Absolutely gorgeous!!

GLOW BLAZE - is another improved version of his neon ancestor! The formula is the same as for the non glow one, but the color is again less neon then for the original one, (REVIEW) and it dries in a semi-mat finish. 
On the photo bellow, the glow blaze in on the left and the original one is on the right!  


When you turn off the lights it has orange glow perfect for fall and especially for Halloween!


Now let's get onto the top coats! 
First the idea of making the glow in the dark top coat is (I think) brilliant! I didn't see this tipes of polishes anywhere else. The thing that makes them extraordinary is the fact that they can be put over any other color or design that you prefer on wearing during the day and still it makes your manicure glow during the night! So if you don't like the colors of some glow in the dark polishes, these are perfect for you!!

They came in a Green, Blue, Purple  and Bleen (blue-green) for now but I know there are some other colors that are being developed :D If you want to know what colors there are and when they coming out make sure you follow Parrot Polish on Facebook because they post new stuff there!!

First one I'm gonna show you is GLOW GREEN - this top coat has the most intense green glow with only one coat!! I've put it over my Paris themed nail wraps and if you've read REVIEW for those then you saw the photos of this amazing top coat! This is the proof that they can be put over anything and still glow amazingly!!


 GLOW PURPLE- another amazing top coat that gave me trouble while photographing it! It keep turning more blue that purple on the camera and I couldn't capture it's real color :( 
I was so sad because the color is beautiful and so unique! But anyways , the formula is great, only one coat is needed to make it glow! Dries fast as all the others do! 
I put one coat over the color of the year - RADIANT ORCHID, this polish is by Manhattan and it's number 26S!


GLOW BLEEN - is a light blue top coat with a hint of green, sort of a turquoise color! Formula, again, great, fast dry and only one coat needed for the effect!! I've put one coat over holographic color called  EMERALD SAND! (REVIEW)


you can still see the spectraflair from the holographic base - so cool


And last but not least is mini Glow Blue- another amazing top coat, with great formula. I applied it over a nail art that I'll show you in another post , but here's how it looks with the lights off :D


And there they are - 6 amazing glow in the dark polishes!!! I love the formula and how amazing they look!! I definitely recommend them to anyone who likes nail polish and nail art, they're must haves! 
You can get them HERE for $11 and FREE SHIPPING, I think that's a great deal!!

Don't forget to find me on Instagram, Bloglovin, Twitter and Facebook   

TILL THE NEXT TIME XOXO 


Sunday, August 31, 2014

Matching Manicures - polka dots

Hi guys! Hope you're having great Sunday. .
Today is the day to do a Matching manicures with my friends from Balkan Beauty bloggers group.
The time is come to do polka dots :)

Everyone who follows my Blog or Instagram, Facebook or Twitter could already see me doing dots in all kinds od ways..but for this occasion I did brand new ones. 

For this design , I was inspire by a picture I found on Google... it's from  I'm Anaa.
It takes some time and patience to do this but I think it's worth it!


For the base I've used  Alpine snow by O.P.I, and for the dots: I Saw...U Saw...We Saw...Warsaw and He blue it this time! both by O.P.I


Hope you liked today's manicures. Till the next time xoxo

You can check out what other girls did here:


Monday, July 21, 2014

How to - ombre nail art!


Hi guys hope you're doing well. It's been raining here in Croatia so since I can't go to the beach I might as well wrote a blog post and show you guys how to do an ombre nail art.


Ombre is been quite popular for a while and not only in the nail art world. Unfortunately I don't know who started it, if you do please let me know in the comments. 
It's one of the easiest and quickest way to have a gorgeous nails :)
The only things you'll need are nail polishes and a make-up sponge.


First I painted my nails white. This step is optional but I think it's better to do it just because if you have a shearer polishes they'll stand out more when layered over white and you will need just one sponged coat. I've used 2 coats of O.P.I Alpine Snow.


Then take the polishes you want to use and put them on the make-up sponge like so...


Then take a make up sponge and dab the colors onto the nails. It's simple like that.
The polishes I've used are (from top to bottom) O.P.I - Vant to bite my neck? , O.P.I - A grape fit!, Essie - hide & go chic and Gothic Gala Lacquers - Crush.

 The only thing that will require some more time is the cleaning up. 

this is how it looks after I dabbed with the sponge

If you want to avoid the mess you can just take a scotch tape and place it on the cuticles like so....


Finish the design with your favorite top coat (at the moment I use Seche Vite) and that's it :)


I hope this tutorial helped you and if you decide to try it please show me the pictures :*
  
Till the next time xoxo

Ps don't forget to follow me on
Bloglovin'