Search This Blog

Showing posts with label step by step tutorial. Show all posts

Tuesday, October 14, 2014

Easy Halloween nail art tutorial #1

Hy guys hope your doing great!
As you probably know, if you follow my blog, I've recently received some glow in the dark polishes  and top coats. The timing of their arrival couldn't be more perfect, since they're perfect for Halloween nail art.
So I did one (so far) using Glow Blaze (REVIEW), vibrant orange in the day and glowing orange in the night :D and it's inspired by Miss ladyfinger! You can use regular orange polish or some other color but glow in the dark makes it special!!


Here is a step by step tutorial:


1 After painting my nails Glow Blaze (review) I've added a dot with my biggest dotting tool using regular black polish
2 I've added second dot, this time a bit smaller then the first one
3 & 4 I've added 4 pairs of legs using black nail art polish ( the one with the striper) and that was it!!!

So easy but yet so effective !!


Did you liked it?  :D and let me know in case you try it :*

You can also find  me on Bloglovin', InstagramFacebook and Twitter  
  
 till the next time xoxo


Monday, October 13, 2014

Easy nail art step by step tutorial

Hello guys!! Hope you had a great weekend =)
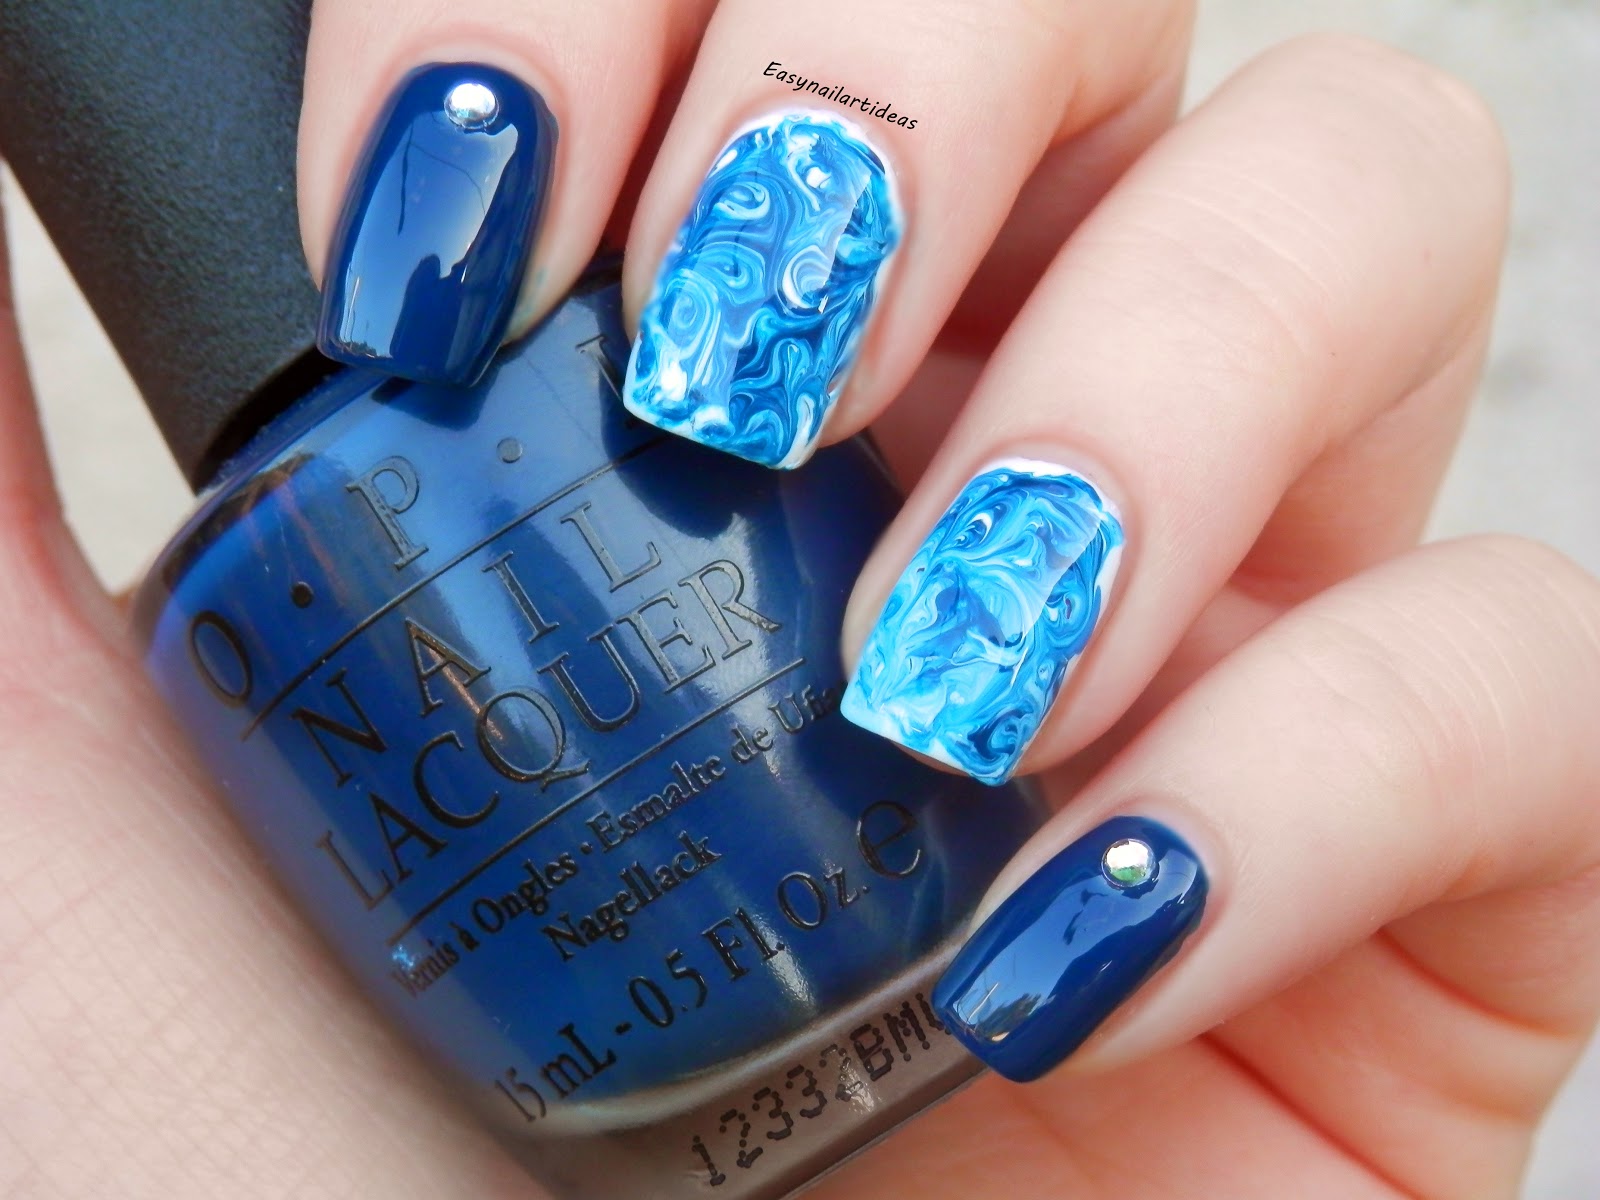
I think it's about time for me to write another nail art post. This time I'm gonna show you one of the quickest and easiest designs I've done so far.
For this design you won't be needing any particular nail art tools or skills. The only things you will be needing are some nail polish and a toothpick!!


To be honest, I wasn't inspired by anything or anyone for this design. It's a product of my laziness actually lol . One day I was thinking how I should do my nails, but I wasn't in the mood for something complicated and I didn't had time for that! So I taught I'll just paint them in one color, no nail art, and that's it.
But when I started to paint them I tought I should try to do some kind of swirls with a toothpick and see how it come out!!
So I did and I quite liked it, so I decided to do it on my other nails and make a tutorial out of it =D


The blue polish I've used on my thumb, index and pinky finger is I SAW...U SAW...WE SAW... WARSAW by O.P.I. This one is from their Spring 2013 Euro Central collection, but I bought it just recently for 50% of in Sephora!! I bought most of my O.P.I's on some kind of discounts or on eBay where they're like 30-40% cheaper than in my local stores (new collections)!
And I added some nail studs for Born Pretty Store (REVIEW), if you don't have anything similar, you can ad some dots or just one or leave it as it is!

I painted my middle and ring finger white, I've used Essie's Blanc and I leave it to dry almost completely!
After that I've put random dots (using the nail polish brush), over the white base. It's not important how the dots look at this point, they don't have to be perfect or anything like that!
For the dots I've used :
 I SAW...U SAW...WE SAW... WARSAW by O.P.I. (dark blue)
HE BLUE IT THIS TIME! by O.P.I (middle blue)
CRUSH by GOTHIC GALA LACQUERS   (light/pastel/baby blue) - REVIEW 
You can use any colors you like. I decided to go with 3 different shades of blue!

As soon as I've finished making a random dots, I took toothpick and just made a swirling movements combining the dots. I've continued to do this until I was satisfied with the results.
At the end I just added some top coat ( Essie's Good To Go!) and that was it :D


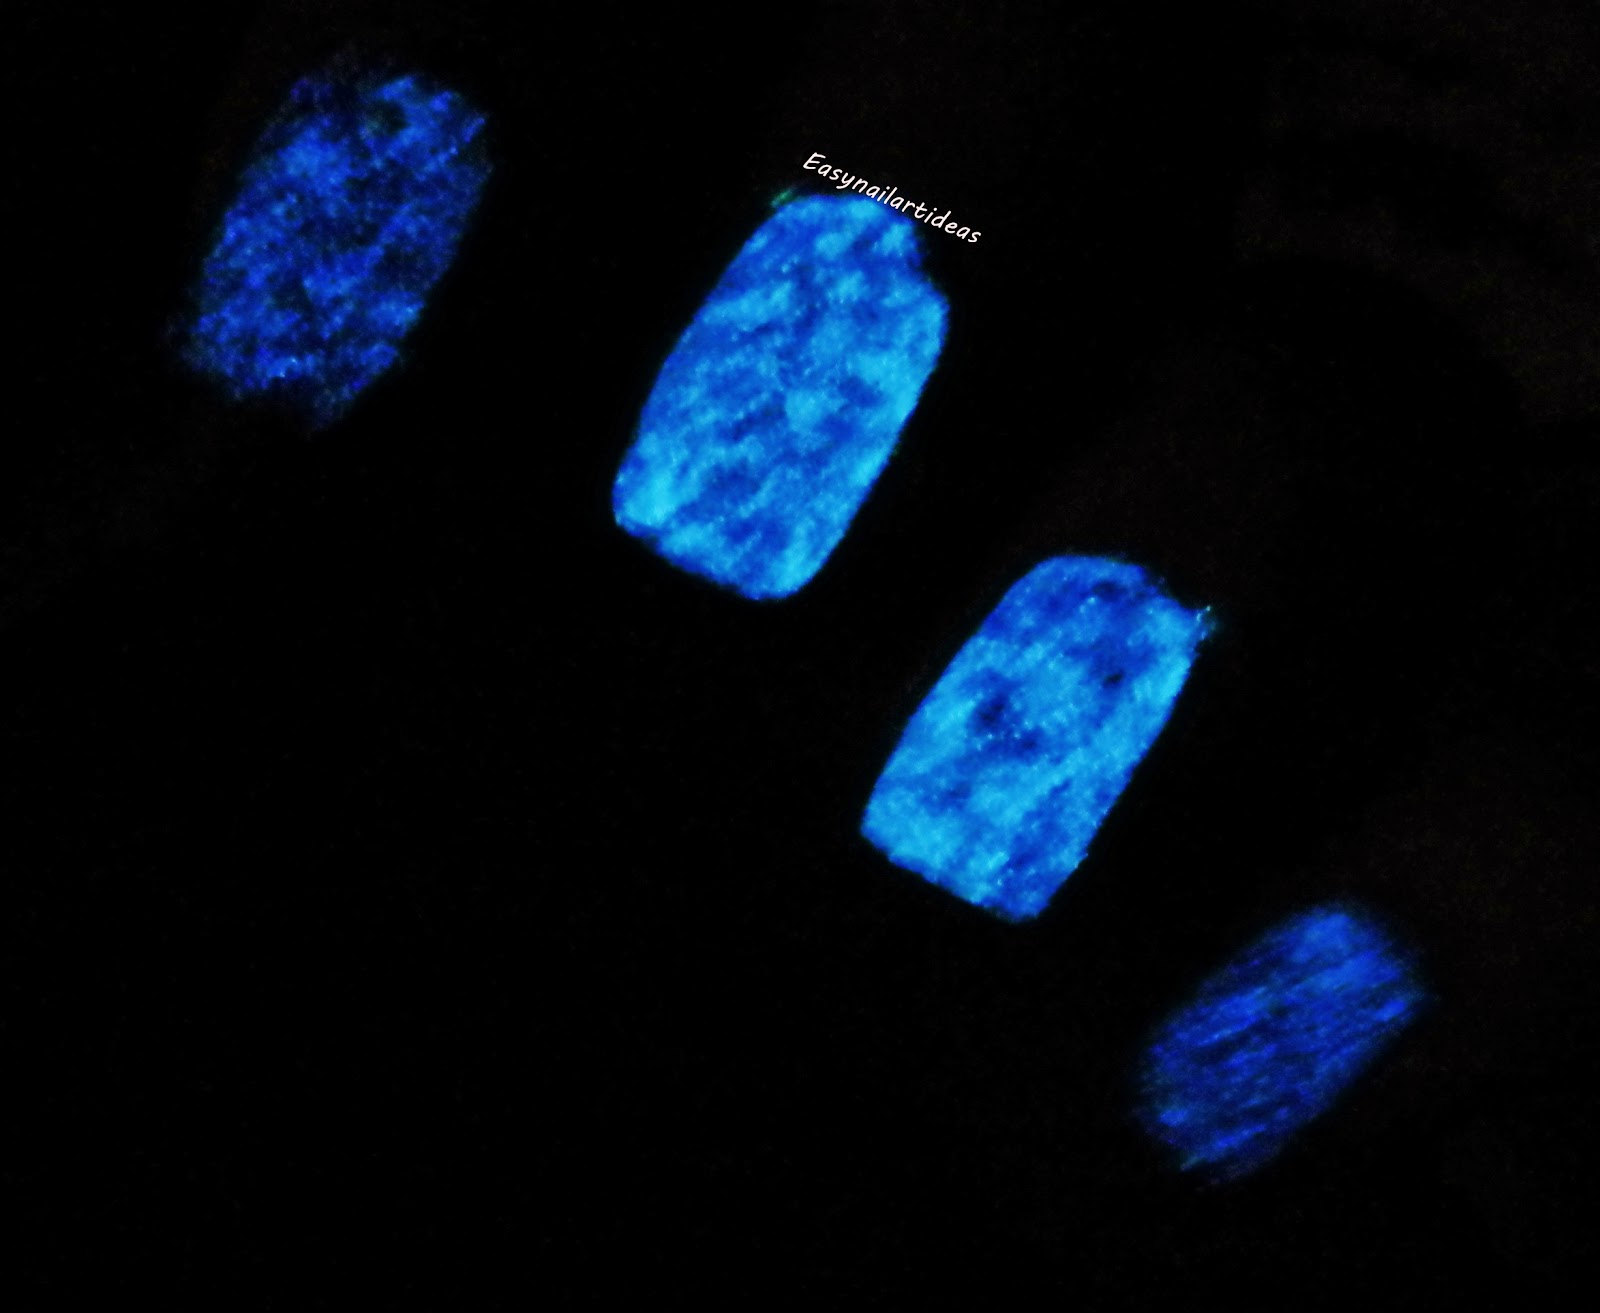
 This is actually the design I've mentioned in my last post about glow in the dark polishes. I've applied Glow Blue top coat over it and came out with this :


 I love, love, love these glow in the dark top coats, they're absolutely stunning :D
If you want to know more about them GO HERE!

I hope you liked this design as much as I did and you'll try it sometime (that would be awesome)

You can also find  me on Bloglovin', InstagramFacebook and Twitter  

Till the next time xoxo 

Tuesday, July 29, 2014

Easy neon step by step tutorial

Hi guys, as promised in my last post I'm gonna show you how I did my neon stud design.


This is really easy to do and fast, the only thing you'll be needing are bright and colorful polishes and neon studs. I have used ones from born pretty store. You can read a review on them here.


1  paint your nails white, I've used O.P.I's Alpine Snow
2  paint the tip of your nail with colors you like (use a brush that comes with a polish, you don't need any special one) , I've used pink polish from ciate, Where did Suzi's man-go? by O.P.I (orange), Wernerite by Polish Alcoholic (neon yellow), You're so outta lime by O.P.I (green) and Hide & Go Chic by Essie (blue)
3  place the studs, make a few dots with a toothpick. Add a top coat and that's it!!

It's so simple... if you don't already own any colorful studs you can get them here!

In case you try this design, please share the photos on my facebook page or Instagram  so I can see them

till the next time xoxo

Thursday, July 24, 2014

Just another easy nail art tutorial!

Hi guys, hope you're doing great! Yesterday I've received some nail mail from Born Pretty Store   so I decided to do a very simple nail art with one of the items that I've got.
They are a nail vinyls or Tip guides (that's what it says on the packaging lol). There are 40 wavy, white vinyls inside.

this is how they look like

 The vinyls are really good, great quality and maybe the most  important thing for me that they are re-usable. Yep you can easily do 3-4 nails with one =). They're strong , won't break easy, also the glue is quite strong so it won't let any of the polish go under it.


Really easy to use and to make great manis.
Let me show you what I did =)

Inside with a flash

Outside - without the flash
 Now the tutorial =)


1 paint your nail a base color and wait until it's dry. I used O.P.I - You're such a Budapest!
2 place the vinyls where you want them
3 paint over with another color. I used O.P.I's Liquid sand - It's frosty outside
4 as soon as you're finished  painting the second  color, before it's dry, remove the vinyls
5 finish up with a top coat ... and that's it =)
Easy isn't it?


I hope you enjoyed todays post =)

You can find this vinyls here . They retail for just $1,26 =)
The Born Pretty Store ships free worldwide =).
you can also use a discount code :

 Don't forget to follow me on:
Bloglovin':  
Instagram:
Twitter:  


till the next time xoxo

Monday, July 21, 2014

How to - ombre nail art!


Hi guys hope you're doing well. It's been raining here in Croatia so since I can't go to the beach I might as well wrote a blog post and show you guys how to do an ombre nail art.


Ombre is been quite popular for a while and not only in the nail art world. Unfortunately I don't know who started it, if you do please let me know in the comments. 
It's one of the easiest and quickest way to have a gorgeous nails :)
The only things you'll need are nail polishes and a make-up sponge.


First I painted my nails white. This step is optional but I think it's better to do it just because if you have a shearer polishes they'll stand out more when layered over white and you will need just one sponged coat. I've used 2 coats of O.P.I Alpine Snow.


Then take the polishes you want to use and put them on the make-up sponge like so...


Then take a make up sponge and dab the colors onto the nails. It's simple like that.
The polishes I've used are (from top to bottom) O.P.I - Vant to bite my neck? , O.P.I - A grape fit!, Essie - hide & go chic and Gothic Gala Lacquers - Crush.

 The only thing that will require some more time is the cleaning up. 

this is how it looks after I dabbed with the sponge

If you want to avoid the mess you can just take a scotch tape and place it on the cuticles like so....


Finish the design with your favorite top coat (at the moment I use Seche Vite) and that's it :)


I hope this tutorial helped you and if you decide to try it please show me the pictures :*
  
Till the next time xoxo

Ps don't forget to follow me on
Bloglovin'

Monday, July 14, 2014

Step by step tutorial

Hi guys hope you're doing great!
Today I'm gonna show you one easy step by step tutorial of one soft and delicate design that I've made.


First you paint your nails a base color. I used "A Brush Of Lilac" by Tip Top Nails South Africa, you can read the whole review on that polish here.

1 Use a white striper to make a wavy line , and then fill the tips of your nails with a cream white polish 

2  Use a dotting tool or a toothpick to make white dots along the curvy line.

3  This time use a smaller dotting tool to make the dots inside the white ones previously made using the base color ( in my case "A Brush Of Lilac" )

4  Make another line, bellow the dots, with a silver stripper 

5 Add some dots bellow the silver line with a base color , add a top coat and that's it


 I think its very easy and simple to do , you only need 3 polishes and a dotting tool (you can also use a toothpick if you don't have the dotting tool).

Hope you like it and you'll try it... if you do please tag me or send me your pictures so I can see =)

Don't forget to follow me on 

till the next time xoxo  

Saturday, March 22, 2014

Collaboration and tutorial

Hi guys, few weeks ago my friend Monica suggested me a collaboration. Without even thinking I said YES!!
The idea of doing a collaboration with such a great nail artist like Monica was so exiting but also challenging. We didn't have to think too much to select a theme ..
We both agree that it have to be CHERRY BLOSSOM =). The perfect design for beginning of spring.

So these are our finished manicure =) As you can see they are very much different. I based my design more on the branches with little flowers while Monica has focused more on the beautiful cherry flowers =)

 To see Monica's other great designs check her fb page Moni's Mani and to read her post about our collaboration you can check her blog : http://monismani.wordpress.com/

Now it's time to show you how I did it :

1. I painted my nails base color, I used essie -Blanc ( you can use any white polish you have)


2. I put a light blue polish on the make-up sponge, that I dabbed into my nail to create an ombre effect ... you can use any kind of sponge you have, or if you don't own them, they really cheep..


With this light blue- white ombre I tried to create something that looks like the sky in the background ...

3. I added some branches with black nail striper


4. With dotting tool I added two shades of pink dots that represents  flowers


5. I added some smaller black dots inside of the flowers, added top coat and that was it =)


I'm so happy that I did this collaboration and although this was the first one for me I'm sure it won't be the last ;)
I hope you liked this as much as I did and that the tutorial was helpful for you..
If you ever try any of my designs please send me your photos  because I would love to see them <3

Till the next post xoxo