Search This Blog

Thursday, July 24, 2014

Just another easy nail art tutorial!

Hi guys, hope you're doing great! Yesterday I've received some nail mail from Born Pretty Store   so I decided to do a very simple nail art with one of the items that I've got.
They are a nail vinyls or Tip guides (that's what it says on the packaging lol). There are 40 wavy, white vinyls inside.

this is how they look like

 The vinyls are really good, great quality and maybe the most  important thing for me that they are re-usable. Yep you can easily do 3-4 nails with one =). They're strong , won't break easy, also the glue is quite strong so it won't let any of the polish go under it.


Really easy to use and to make great manis.
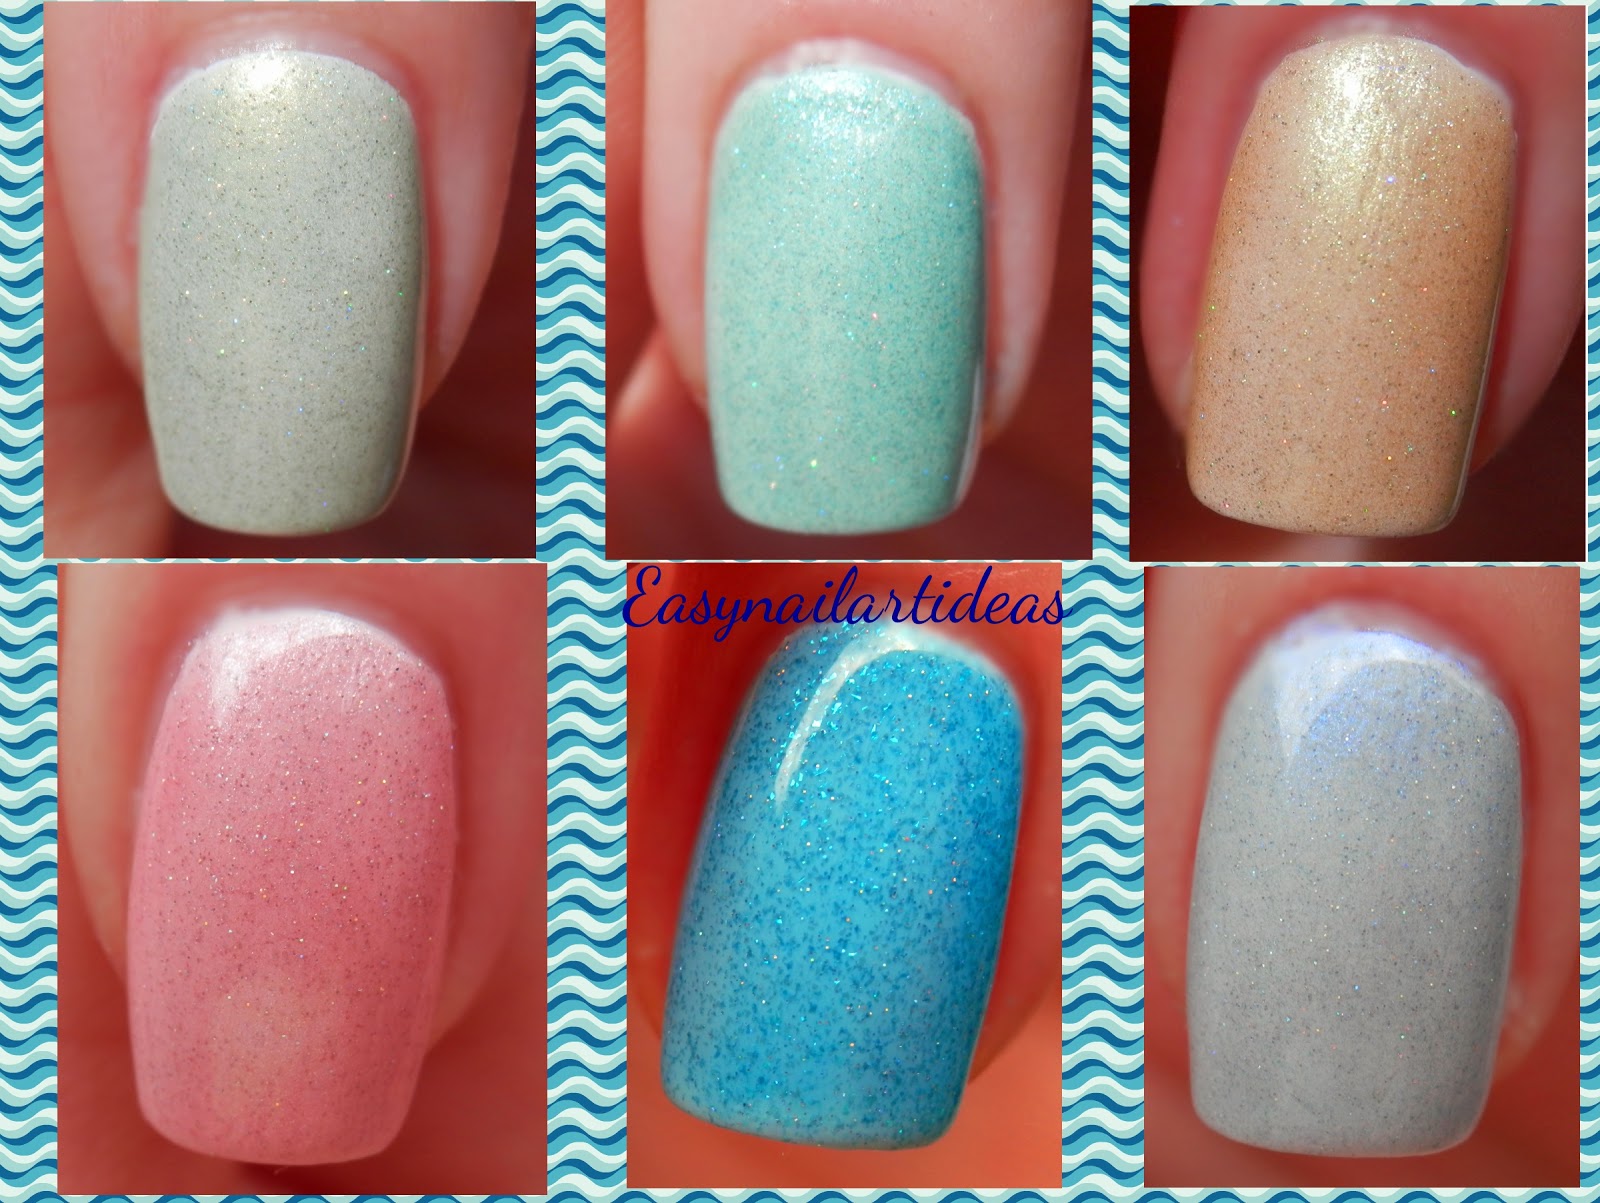
Let me show you what I did =)

Inside with a flash

Outside - without the flash
 Now the tutorial =)


1 paint your nail a base color and wait until it's dry. I used O.P.I - You're such a Budapest!
2 place the vinyls where you want them
3 paint over with another color. I used O.P.I's Liquid sand - It's frosty outside
4 as soon as you're finished  painting the second  color, before it's dry, remove the vinyls
5 finish up with a top coat ... and that's it =)
Easy isn't it?


I hope you enjoyed todays post =)

You can find this vinyls here . They retail for just $1,26 =)
The Born Pretty Store ships free worldwide =).
you can also use a discount code :

 Don't forget to follow me on:
Bloglovin':  
Instagram:
Twitter:  


till the next time xoxo

Monday, July 21, 2014

How to - ombre nail art!


Hi guys hope you're doing well. It's been raining here in Croatia so since I can't go to the beach I might as well wrote a blog post and show you guys how to do an ombre nail art.


Ombre is been quite popular for a while and not only in the nail art world. Unfortunately I don't know who started it, if you do please let me know in the comments. 
It's one of the easiest and quickest way to have a gorgeous nails :)
The only things you'll need are nail polishes and a make-up sponge.


First I painted my nails white. This step is optional but I think it's better to do it just because if you have a shearer polishes they'll stand out more when layered over white and you will need just one sponged coat. I've used 2 coats of O.P.I Alpine Snow.


Then take the polishes you want to use and put them on the make-up sponge like so...


Then take a make up sponge and dab the colors onto the nails. It's simple like that.
The polishes I've used are (from top to bottom) O.P.I - Vant to bite my neck? , O.P.I - A grape fit!, Essie - hide & go chic and Gothic Gala Lacquers - Crush.

 The only thing that will require some more time is the cleaning up. 

this is how it looks after I dabbed with the sponge

If you want to avoid the mess you can just take a scotch tape and place it on the cuticles like so....


Finish the design with your favorite top coat (at the moment I use Seche Vite) and that's it :)


I hope this tutorial helped you and if you decide to try it please show me the pictures :*
  
Till the next time xoxo

Ps don't forget to follow me on
Bloglovin'

Monday, July 14, 2014

Step by step tutorial

Hi guys hope you're doing great!
Today I'm gonna show you one easy step by step tutorial of one soft and delicate design that I've made.


First you paint your nails a base color. I used "A Brush Of Lilac" by Tip Top Nails South Africa, you can read the whole review on that polish here.

1 Use a white striper to make a wavy line , and then fill the tips of your nails with a cream white polish 

2  Use a dotting tool or a toothpick to make white dots along the curvy line.

3  This time use a smaller dotting tool to make the dots inside the white ones previously made using the base color ( in my case "A Brush Of Lilac" )

4  Make another line, bellow the dots, with a silver stripper 

5 Add some dots bellow the silver line with a base color , add a top coat and that's it


 I think its very easy and simple to do , you only need 3 polishes and a dotting tool (you can also use a toothpick if you don't have the dotting tool).

Hope you like it and you'll try it... if you do please tag me or send me your pictures so I can see =)

Don't forget to follow me on 

till the next time xoxo  

Saturday, July 12, 2014

The Mermaid collection!!

Hi guys hope you're doing great... As you probably know it's summer here in Croatia but man the weather seems not to agree with that..it's been raining for days now :/ I hope it would stop soon so I can take my manis to the beach lol

I'm super excited for todays post because for the first time I'm doing a review on the whole polish collection =))
I'm gonna show you the prettiest and girliest collection I've ever seen. Its a Mermaid collection by Paint Shop Polish =)


If you're following my blog for a while then you'll know I've already reviewed some of the polishes from this Indie 5-free polish brand. They were all glitter polishes from the Vampire diaries collection and in case you've missed the review , you can find it here =)

Now let's get down to the swatches and reviews =)
The Mermaid collection consist of 6 beautiful shimmery, holographic polishes. They are all Camphor, Toluene, Formaldehyde, DBP and Formaldehyde resin free. One of the great things about this collection is that the formula is a bit on the sheerer side so they can be layer over other cream polishes and make them really pop. I've tried to do that and the results are amazing. I'll show them bellow so keep reading
 =)


First one is called Under The Sea - and its a blue holographic polish with a teal undertone. They are all on the jelly side so I used 3 coat for the full opacity . But in case you would want a jelly finish 1-2 coats would be fine. The formula is great, application also.. very smooth and easy. No issues at all.


3 coats on its own


Siren Song is a holographic light purple polish with a blue shimmer and a silver undertone (really hard to describe this unique color). Depending on the lightning it shift from purple to blue - very interesting polish. The formula is bit sheerer then fort the previous one but builds up nicely. Application is flawless!

3 coats on it's own 


one coat layered over You're Such a Budapest by OPI


Coral Reef is a gorgeous pink holographic, pearlescent , shimmery polish. I love this one it has the most amazing shimmer. The formula is great, application flawless. Take a look at the photos

3 coats on its own
one coat layered over light pink polish


 Fishtail  is a sea green holographic polish with an amazing pearlescent effect when layered down over some other cream polish. Opaque in 3 coats. Formula is grat as for the others.

3 coats on its own    


1 coat over mint green polish. The picture doesn't show how amazing this looks (it was cloudy :/ ) 

Seaweed's gardens  is a light green holographic polish with a lot of golden/yellow undertone and shimmer. Great formula and application . Amazing shine =)

3 coats on it's own


 And last but not the least is Mermaid's Gold =) This is a golden holographic polish with gorgeous pearlescent effect. Opaque in 3 coats, and no application issues!

3 coats on its own


To be honest I was in love with this collection at the moment I saw it =) so I couldn't just stop on the swatches. I really wanted to know how the polishes looks like layered over plain old white polish.... let me just show you the pictures .... ps I have applied only one coat of the mermaid's polishes..


And that my friends was the entire Mermaid collection. My favorites are Under the Sea, Coral Reef and the Fishtail =)

You can find all the polishes on PSP's etsy shop , they retail for 6$ - 5ml and 10.50$ - 10ml, shipping is worldwide =)))

I hope you've enjoyed reading this review as much as I enjoyed writing it.  

don't forget to follow me on

Till the next time xoxo 


Saturday, July 5, 2014

My ultimate stamping kit

Hello my friends, hope you're doing great  =)
I decided to share my ultimate stamping kit with you today. I've tried so many plates, stampers and scraper before I've found  the ones that works for me.


First stamping kit that I bought was from the brand called Essence and it was quite affordable but also not so great.


I ruled out the scraper from the beggining because it have a metal part at the bottom which scrapes the plate and leave ugly marks on it. Instead I've used old credit card.
The stamper works good on smaller images but it's difficult to transfer the whole, large image  on the nails. It doesn't pick up completely and the image is not nice and clean :/


I decided to try with some other plate so I ordered one with a gorgeous designs from Born Pretty Store.
The results was better but still not perfect.


I also try to change a stamper. I've tried the one from MoYou London but this one didn't pick up the image at all :/
I know many of nail artist and blogger also love and make great reviews on Konad stamper but I just couldn't afford it =(
At this point I wanted to give up from stamping, I tought I was just not good enought to do it and that this is not my kind of thing.

But after some time spent thinking,  I decide to give one last chance to stamping. I ordered stamping kit from BPS that was quite affordable only $2,99 it contains a double side stamper and scraper.


I imediatelly tried it, once I received it and I love it. You will see the improvement =))
I'm just gonna say it made me not to give up from stamping =)
It's really good, picks up and transfer image nicely . It's really easy to use and its bigger then the ones I owned so it's lot more comfortable in the hand and easier to hold.


I've made this post to make life a bit more easier to all nail art beginners who would like to try themselves in stamping. This is the kit I would recommend you to try since its affordable and great quality. Instead of trying a lot of stampers and plates and ended up to be disappointed , try this one, and you wont be sorry =)

In case you decide to purchase this kit (or anything else) from BPS don't forget to use a 10% off code


Let's connect on other social medias :
Instagram
Twitter
Facebook
Bloglovin'


till the next time xoxo

Tuesday, July 1, 2014

Oh wow! by Let it glitter!

Hello my nail lover friends =) how are you today?
I passed the most difficult exam I had left yesterday so I'm really, really happy :D I have only one till the end and that makes everything even better..

Let's get down to what I'll be showing you today... It's a gorgeous glitter bomb by Let it glitter!
Let it glitter is a handmade nail polish brand run by Suzanne, nail artist and blogger herself =)
After some time doing nail art and running a successful blog she decided to try herself in making polishes.
She based her brand on some of the most unique and colorful glitter combinations.
The polish that I have to show you is called Oh Wow! =) The name really justifies the looks because the only thing you think of when you see this gorgeous glitter combo is - Oh wow =)

This glitter nail polish is a part of the "Pink and Teal" collection and it contains bigger fuchsia (hot pink) and smaller white and teal hexagonal glitters. I love this combination I think it would look great over any color especially the pastels.
I decided to pair it with a baby pink (pastel pink) polish from O.P.I called Pink-ing of You (awww) and these are the results


I love this polish its so wearable,  fun and vibrant. the formula is good, application is pretty much as for all the other glitter polishes (you have to dab a little to place them where you want). 
I think I'm gonna wear it a lot this summer =)

You can fin Let it glitter! on Etsy, facebook and of course on her blog =)


Hope you've enjoyed todays post, don't forget  to follow me on

till the next time xoxo